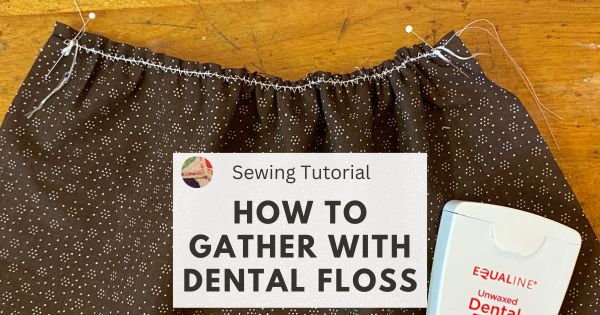
Gathering fabric is a useful technique commonly used when sewing home décor projects and garments.
If you struggle to gather fabric using the traditional gathering method that calls for two rows of basting stitches, then you’ll like this quick and easy method using dental floss.

The most commonly used gathering method calls for you to sew two rows of basting stitches which are gently pulled to gather the fabric. This method of gathering is tedious and often frustrating if the basting stitches break as they are pulled.
The gathering method I will demonstrate today is quick and easy using dental floss. Dental floss is stronger than regular thread, so you don’t have to worry about it breaking as you manipulate the fabric.
In this video and post, learn how to sew gathers using dental floss.
Disclaimer: This post may contain affiliate links. We make a small commission on sales through the affiliate links, at no extra cost to you. Thank you in advance for your purchase and your support! Please see our full Affiliate
Statement for more information.
![Gather Dental Floss 12 Gathering]()
WHAT YOU NEED for the dental floss gathering technique:
- Plain or Waxed, Unflavored Dental Floss
- Project to be Gathered
- Threaded Sewing Machine with a Zigzag Function
- Scissors
![Gather Dental Floss 1 Showing Floss]()
INSTRUCTIONS for using dental floss method to gather:
![Gather Dental Floss 11 Showing Gathered Floss and ungathered fabric]()
STEP 1: work within the seam allowance
First, you need to check on the width of the projects seam allowance to make sure your gathering stitches are within this seam allowance so they will not show on the front of the fabric later.
STEP 2: set sewing machine for zigzag stitch
Set the sewing machine for a zig-zag stitch. Lengthen the stitch width and length slightly. ![Gather Dental Floss 2 Zig Zag Stitch]() On my Bernina machine, I used a zigzag length of 2 and a width of 3.5.
On my Bernina machine, I used a zigzag length of 2 and a width of 3.5.![Gather Dental Floss 3 Showing Stitch Settings]()
STEP 3: Tread dental floss
Thread the dental floss through the presser foot opening. ![Gather Dental Floss 4 Thread Floss Through Foot]() This will help to keep the floss centered as you stitch.
This will help to keep the floss centered as you stitch.
If your sewing machine presser foot is clear, you don't have to do this.
STEP 4: Lay the dental floss on the fabric to be gathered
Leave a tail of at least 3 inches and lay the dental floss down on the fabric to be gathered (inside the seam allowance). You want the dental floss to line up with the center line of your pressure foot. ![Gather Dental Floss 5 Floss across fabric]()
Start stitching making sure you are zigzagging over the top of the dental floss so that the stitches are on either side of the floss without stitching through it. ![Gather Dental Floss 6 Stitching]()
IMPORTANT TIP: Make sure that you do NOT sew through the dental floss at any point, as you won’t be able to gather the fabric if you do.
The zigzag stitch will act as a loose casing for the dental floss. ![Gather Dental Floss 8 Stitching Close Up]() When you get to the end, leave a long tail of at least 3 inches.
When you get to the end, leave a long tail of at least 3 inches.
STEP 5: Gather the fabric
After stitching the length of fabric, you just pull both ends of the dental floss to gather it.
OR
You can secure one end of the dental floss by wrapping the dental floss in a figure 8 around a pin so it doesn’t pull out during gathering. ![Gather Dental Floss 9 Pin Holding Floss]()
Then gently pull the other end of the encased floss to create the gathers. ![Gather Dental Floss 7 Stitching with Floss]()
Once you have the desired amount of fullness, you can secure the gathers by placing a pin and doing a figure eight around the pin.![Gather Dental Floss 10 Gathering]() Now adjust the gathers and attach them to your project.
Now adjust the gathers and attach them to your project.
Gathering using this technique is simple, easy, quick and saves a lot of frustration.
Advantages of using dental floss to gather fabric
- Dental floss won't break as easily as sewing thread
- This gathering method is great when gathering heavy-weight fabric
- Light fabric like tulle gathers nicely with this dental floss technique
- Quicker gathering method because no need to sew multiple lines of thread
The next time you have to gather consider using this dental floss technique.
Are you going to add some dental floss to your sewing box?
Happy Sewing!
QUESTIONS?
If you have any questions about this project, contact us through the YouTube Video
comments or our Contact Us page. We respond to questions in e-mails and YouTube comments regularly.
more articles on gathering
Supporting Products and links: Some of the links below may be affiliate links.
We make a small commission on sales through the affiliate links, at no extra cost to you. Thank you in advance
for your purchase and your support! Please see our full Affiliate
Statement for more information.